By Sean Reed -
Objective
The session is a finishing session with players combining, finishing from angles and attacking a cross.
This session can be done with a small group of players or with players looking to do some extra work after training.
1st Ball – For player 1 to combine and finish on goal
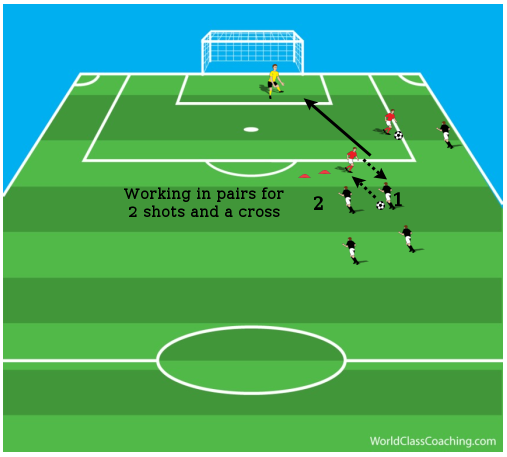
Diagram 1
Set Up
- The session is carried out in around the edge of the area. You can work for a period of time or a number of shots one side (right side) then move across to the other side (left side)
- Working in pairs.
- A player out wide working on their crossing. Depending on the number of players or coaches available. The wide player can combine for the cross or run with the ball before a cross (if on their own).
- If there are more players working on their crossing you could set up players both sides and alternate the crossing
- 2 cones or a mannequin can be used to combine round
- Player (1) plays a pass into the coach who then plays a pass back for player (1) to receive, drive forward and take a shot off. See diagram 1
- After player (1) shots, player (1) will take up a position near the cones or mannequin to receive the next pass from player (2) to play a 1-2 for player (2) to get a finish. See diagram 2
- After both players have had a shot, the next movement is to then attack a cross from wide areas. See diagram 3
- The wide player combines with the coach or other wide player or runs with the ball beating a mannequin (if working on their own) and delivers a cross. If there are wide players from both side, the opposite wide player can attack the cross from the back post
- If required you can add a recovery run if a physical element wants to be achieved. These can be included as either part of the work or a pair fails to score at least one goal
Coaching Points
- First touch to break the line
- Change of pace to get onto the ball
- Shoot across the goal keeper – far post
- Hit the target with the strike
- 2nd Movement: awareness of where to support and receive the ball
- Movement and positive being run for the cross
- Timing of runs - avoid getting into early. Use the wide players head, when they look down to cross as a trigger point Must get one player across the front post
2nd Ball – For player (2) to combine with player (1) to create a shooting opportunity
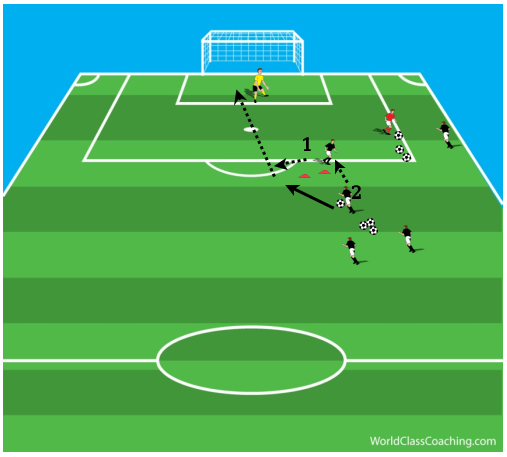
Diagram 2
[wpsharely id="1204"][/wpsharely]
3rd Ball – Wide player combines to deliver a cross
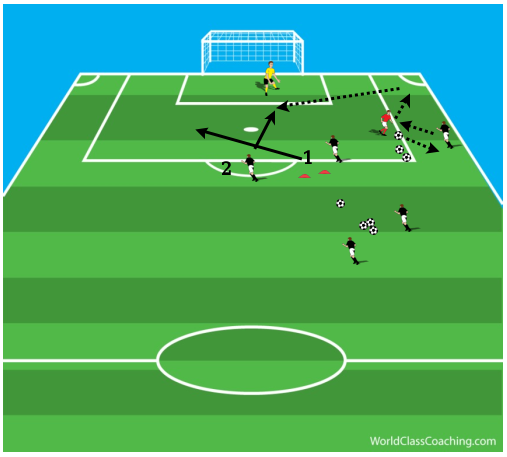
Diagram 3
By Sean Reed
Former First Team Coach of Championship side Fulham FC. Sean is a UEFA A Coach with a Masters in Sport Coaching. He has over 15 years of experience working in professional football from Academy through to First team in the Premiership and Championship.
Linkedin - www.developmentofplayers.com
Twitter - @SeanJReed

