By Sean Reed -
Objective
This session will focus on the transition from an attacking phase to a defending phase with an overload.
Set Up – 1st Phase
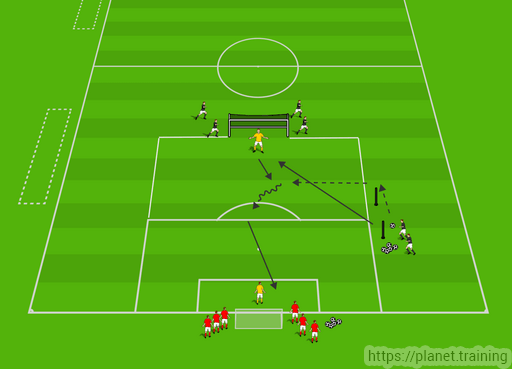 Diagram 1
Set Up
- 12 Outfield players and 2 Goalkeepers
- The pitch is 2x penalty boxes with an extra 5yds
- Team in Red bibs start with 3 players each side of the post
- Team in Black bibs with 2 players to the side and the other 4 (2 either side of the post)
- Player on the side plays a pass from the 1st pole into the GK’s feet then makes run past the 2nd pole to receive the ball from the GK
- Player takes a 1st touch to set for a finish, then strikes on goal
Coaching Points
- Quality of pass into GK
- Movement and angle of support
- 1st touch to create shooting opportunity
- Finish on target
Set Up – 2nd Phase
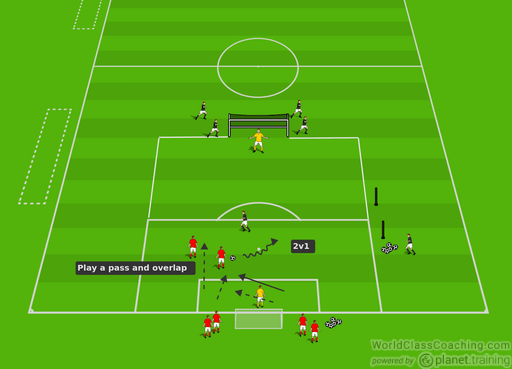 Diagram 2
Set Up
- The player who has just taken the shot is now required to defend 2v1
- (Team in Red Bibs) 1st player plays a pass into a 2nd player, then makes an overlapping run round to support
- The 2v1 are attacking and looking to finish on goal
- If the defending player wins possession then they can look score
- This phase ends with either a goal, in GK’s hands or ball out of play
Coaching Point
- Switch of mindset Attacking to defense
- Defender player try to isolate player in possession of the ball and keep them going away from goal
- Attacking players play quickly
- Forward runs to create passing opportunity
- Positive in 1v1 situation
- End product on target
Set Up – 3rd Phase
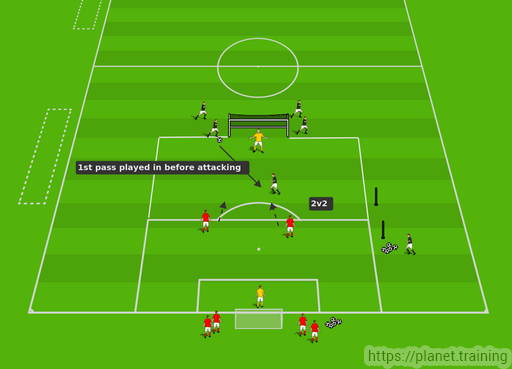 Diagram 3
Set Up
- From a 2v1 to a 2v2 situation
- (Team in black bibs) Player on the post must play a pass before attacking
- (Team in red bibs) switch of mindset from defense to attack
Coaching Points
- Play quickly to exploit the mindset and unprepared nature of the opposition
- Be positive and direct in attacking area
- Create space and shooting opportunities
- Forward movement to create situations
- Look to create 2v1 or 1v1 in attacking favour
- Defending maintain supporting and covering distances and angles
- Avoid being isolated
- Keep the attacking player going away from goal
Set Up – 4th Phase
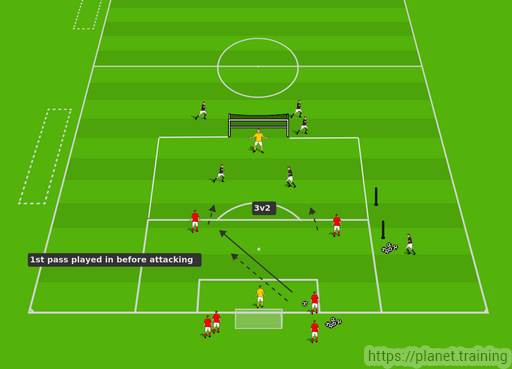
Diagram 3
Some Coaching Points
- As within the previous phases
By Sean Reed
Former First Team Coach of Championship side Fulham FC. Sean is a UEFA A Coach with a Masters in Sport Coaching. He has over 15 years of experience working in professional football from Academy through to First team in the Premiership and Championship.
Web - www.seanjreed.com
Twitter - @SeanJReed

