By Sean Pearson
In these Systems of Play articles, I aim to address a wide range of 7 v 7, 9 v 9 and 11 v 11 formations and ways in which to use your players to your advantage.
Formation
Two of the most popular formations in world soccer are the 4-3-3 and 4-2-3-1, mainly because it gives you a dominance in central midfield without sacrificing balance from your formation in other areas. I will explain how to play out from the back in a 4-3-3 against a man marking midfield.
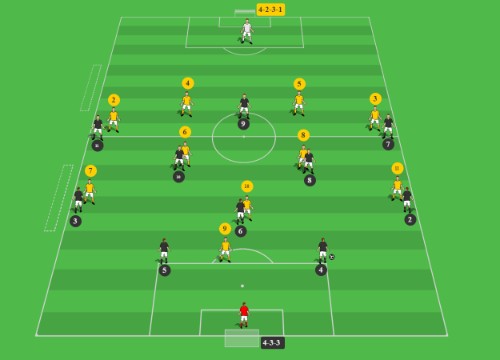
Countering the Man Marking Midfield
Because of the slightly different starting points in the midfield from each of the formations when the systems play against each other they match up. It is an easy tactic for coaches to use when defending to adopt a man marking style. The physical profile and position of your players determine that the #10 of the 4-2-3-1 marks the #6 of the 4-3-3, the #8 marks the #8 and the #6 marks the #10.
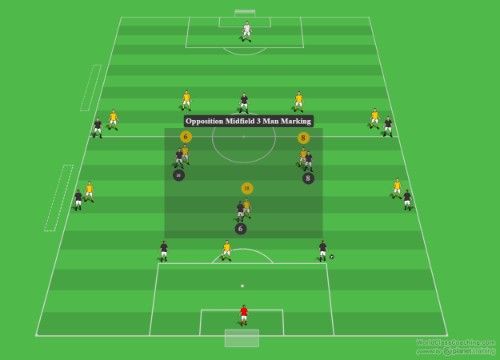
The reason why man marking can be so effective is because the central midfield stay central and allow the opposition to keep the pressure on those players when receiving the ball. The way to counteract that is to use the man marking against the opposition.
Man-marking is about following your designated player all over the field, it is very annoying for an individual player to play against and they can become more and more frustrated because they spend all their time trying to get away from the marker and when they get the ball they are under instant pressure.
The opposition expects and want you to keep your central midfield in the center of the field, they have the power at this moment. To counteract this tactic of following your players you are going to move and spread the midfield out. When doing this the midfield will now have much more space to play in, rather than keeping your players there.
When playing out tell your CB to come forwards with the ball, your #6 then curves underneath and takes the CB’s place. The opposition #10 will follow your #6. As the CB comes forward have both your #8 & #10 drop down and pull out wide, this pulls both opposition midfielders wide, where they don’t want to be, and create space in the middle. The striker drops down at this moment.
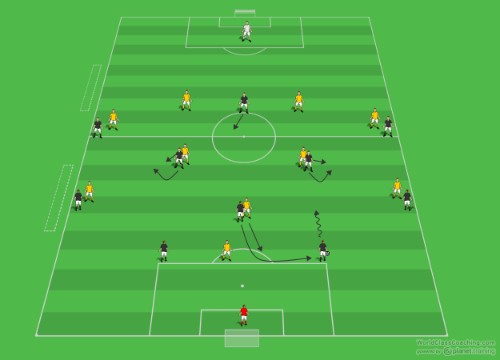
Your CB now has a couple of options and this can come from your instruction as well.
1) They can play to the striker. At this point your #8 & #10 run behind their markers and look to receive a pass from the striker. When the ball is passed to the striker the midfielders, who are marking, will generally watch the ball. If they do not watch the ball and follow your players, this is why you come down first to draw them away from where the ball is going and then your players can sprint forwards, creating separation, to receive the pass.
2) if your CB is particularly fast, has good ball control and is able to make good passing decisions, when this space opens up they can continue with the ball. Eventually an opposition player will have to engage but by this point you will be further up the field.
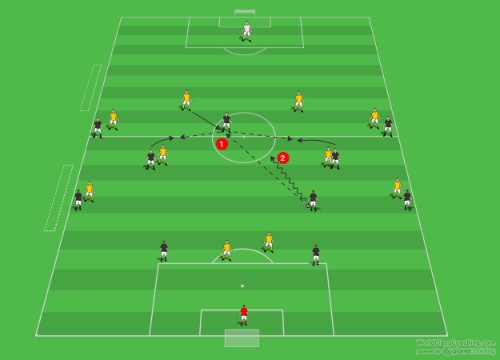
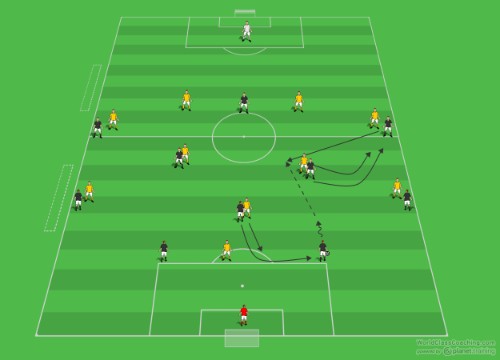
A different option can be, at the same point when you CB has the ball, have a CM rotate with a WS (wide striker). The CM drops down and then curves their run up while at the same point the WS drops down into the space left by the CM. The FB will rarely, if at all follow, as this is an uncomfortable and unfamiliar position for them. If they do begin to follow, then have the WS stop their movement and allow your CB to continue their run into the midfield.
What you have to communicate effectively to your team and especially the central midfielders is to stay calm and realize when and where their opportunities will come. If the team and players understand why you are doing what you are doing and see success they will be more responsive to do what you are asking, rather than not put the extra work in needs.
By Sean Pearson. Sean is also the author Coaching Team Shape in the 3-3-1, Coaching Team Shape in the 4-2-3-1 and Coaching Team Shape in the 4-3-3

