By Sean Pearson
With the new USSF mandated birth year and small sided games changes there is a lot of trial and error regarding formations and systems of play. Instead of 8v8 formations, as coaches, we are now trying to figure out how to position our players in the new 7v7 and 9v9 formations. Some clubs have an academy structure where all teams must play the same formation, others allow coaches to choose what works for their team because players in each team have different attributes.
In these Systems of Play articles, I aim to address a wide range of 7v7, 9v9 and 11v11 formations and ways in which to use your players to your advantage.
Formation
The 2-3-2-1 is effectively the 4-3-3 in 9v9 form without the wide strikers. You could also say it is a 4-3-1 or a 2-3-3. The issue I have with both the latter formations is that they tell (psychologically) the wide players to be either too defensive or too attacking. I like to think of them more as wing backs, so they understand that they have both defensive and offensive duties. So effectively when defending it is a 4-3-1 and when attacking it is a 2-3-3.
How to Use the Width
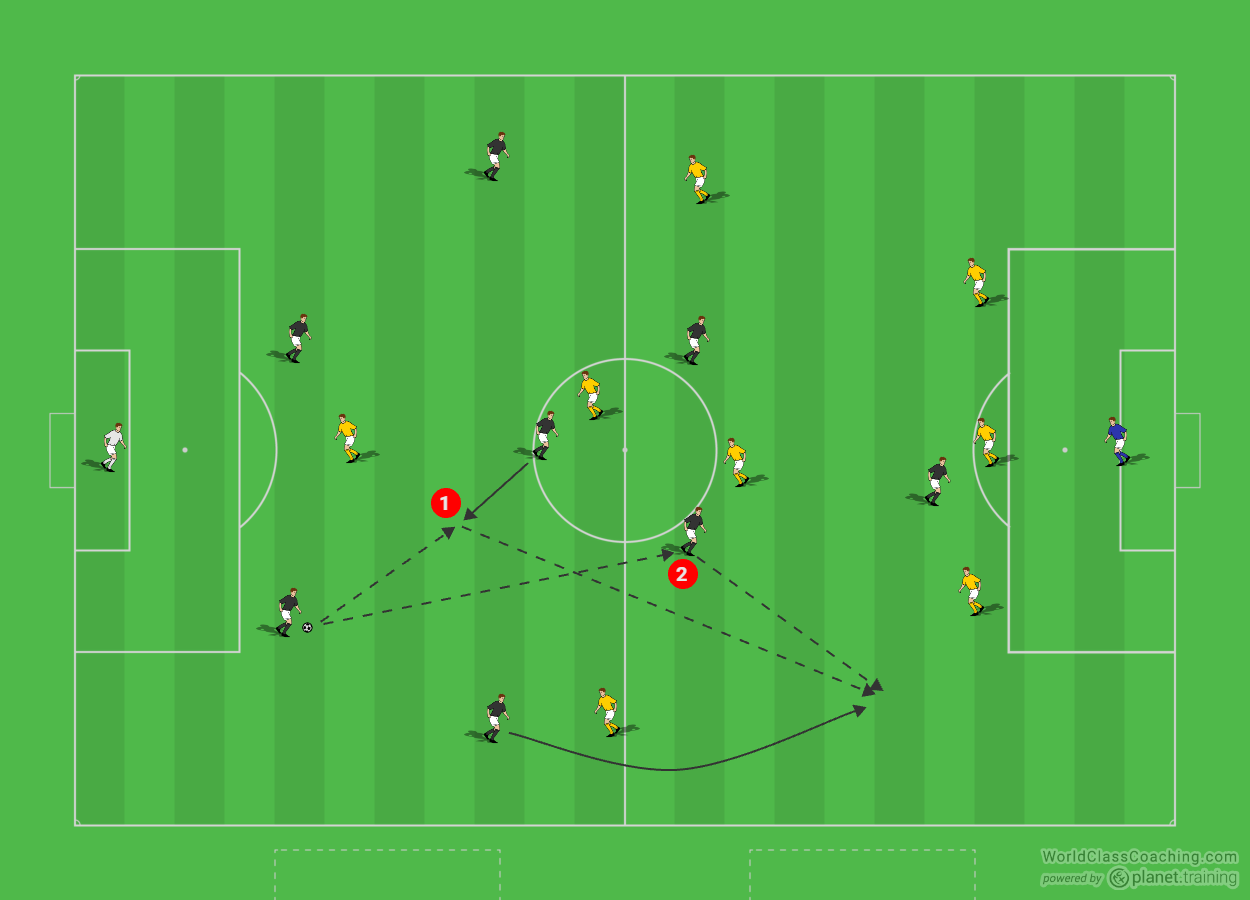
When playing out from the back look to utilize the probable numerical advantage in the center of midfield to then play the ball out wide. 1) the defensive midfielder (#6) drops down away from the opposition attacking midfielder. Or 2) the center back can play an attacking midfielder (#8 or #10). As the ball is travelling to a central midfielder the wide player (#2 or #3) overlaps the opposition wide midfielder.
When your team progresses up the field in the 2-3-2-1 formation it is up to you as your preference as a coach how many players and which players go forward. You could tell your opposite wide player to ‘tuck in’ alongside the two defenders to make a back three for extra defensive stability. Or you could allow both wide players forward and instruct your defensive midfielder to drop in between the two defenders, again to make a back three. If you are comfortable with a back two then don’t move anyone to form a back three.
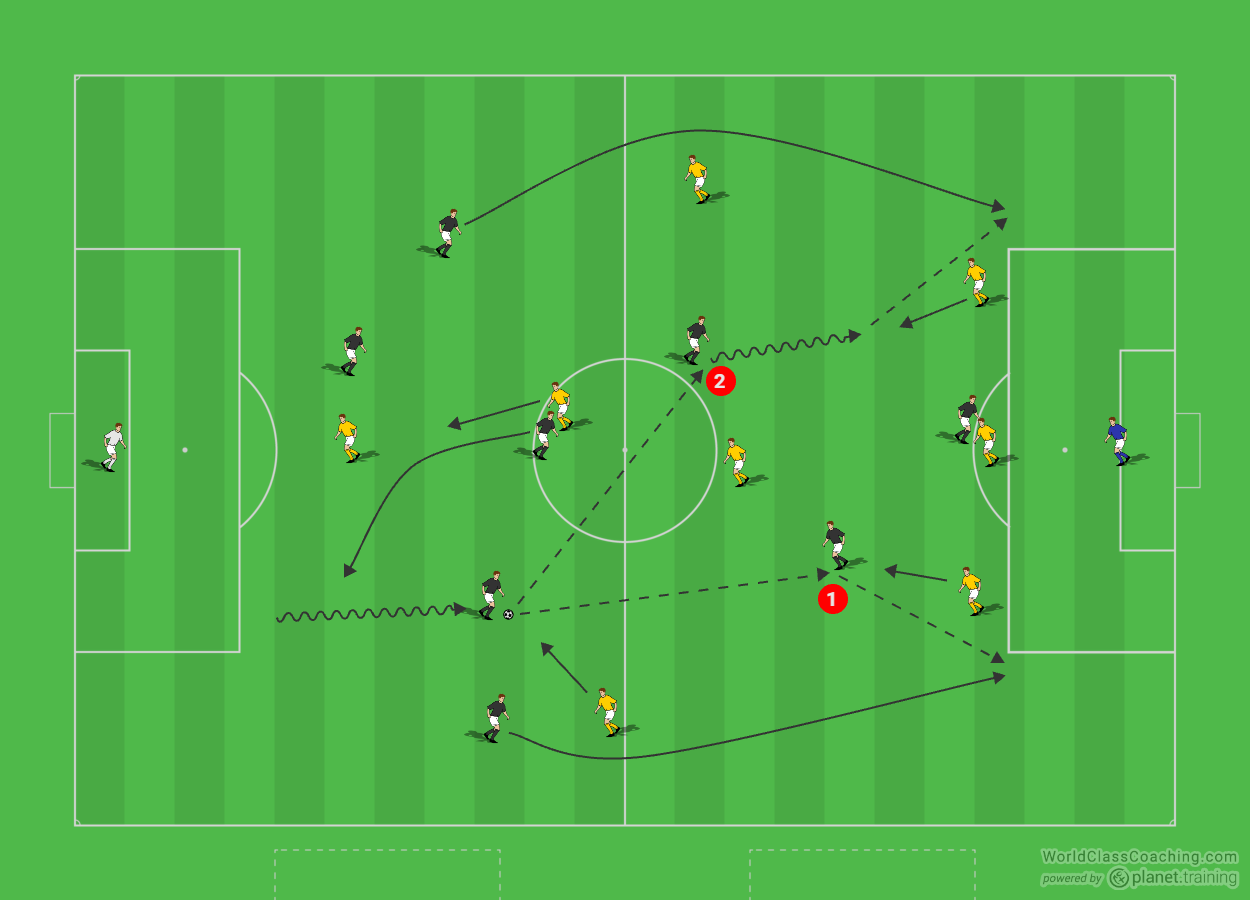
Alternatively, allow your center back to come forwards with the ball, at the same time the #6 curves down and around to become the ‘new’ center back and protect the defense. The #2 and/or #3 overlaps while the positions of the attacking midfielders confuse the opposition full backs. Because of their central position and the center back is occupied by the striker, they have to come in to pressure them.
So when the center back advances forwards 1) the attacking midfielder receive the ball closer to the defense so it draws the full back towards him, as the #2 overlaps the pass is played behind the full back. 2) if there is space to move forwards with the ball they can commit the full back and again play in behind them to the overlapping player. In both scenarios you create a 2v1 against the full back to get behind the defense and look to attack the goal for a scoring opportunity.
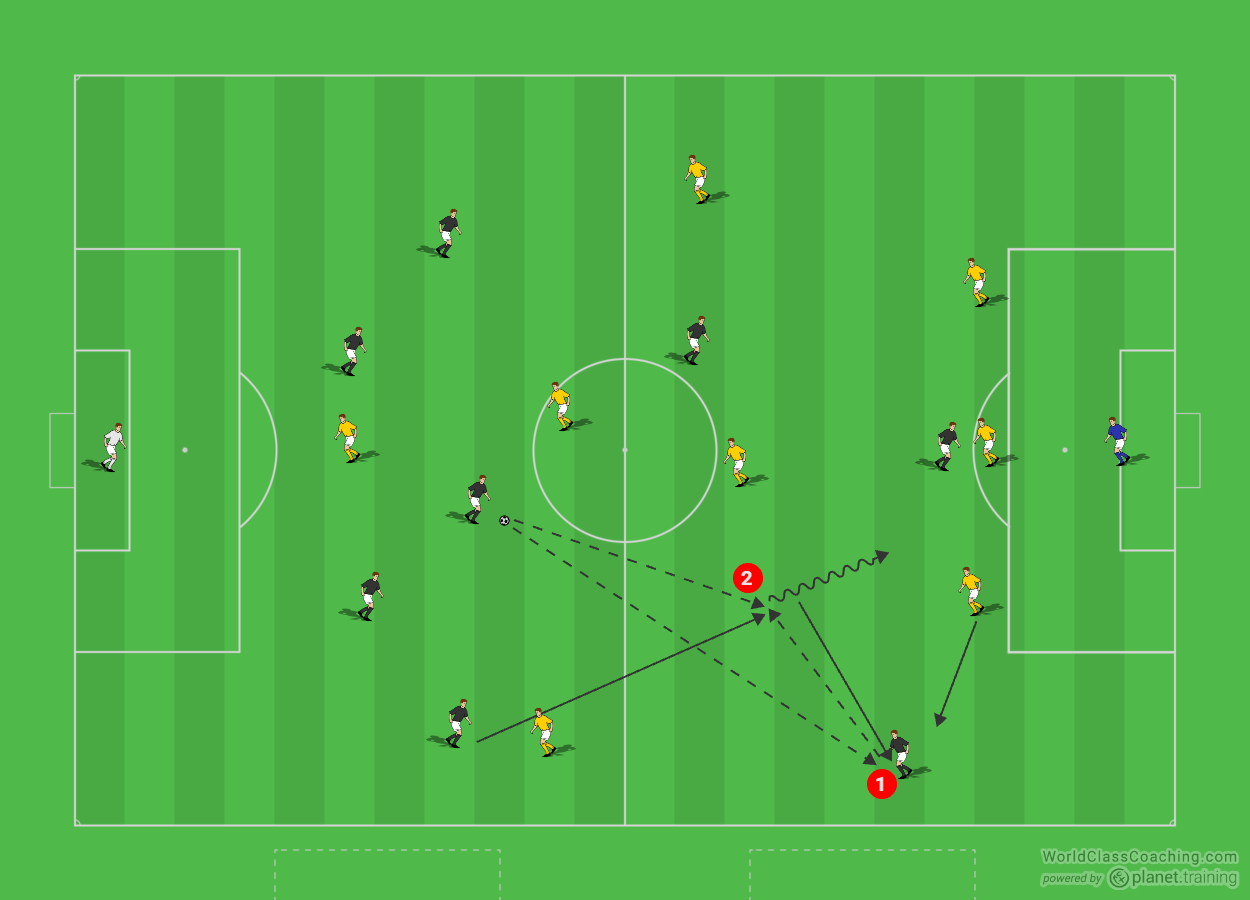
Alternatively, instead of always having the #2 & #3 supplying the width, on occasion the 2 attacking midfielders can also move out wide as they are naturally further up the field. 1) they could receive the pass from the defensive midfielder and then attack the full back 1v1 or 2) now there is space after the attacking midfielder vacated it and the opposition full back has been drawn out of position, the wide player can make an underlapping run and now you can create another 2v1 against the full back.
Because of the 3 central players you will most likely overload the middle of the field against other formations. To utilize the width, it is important you use this overload to facilitate in getting the ball wide to then expose the opposition fullback.
By Sean Pearson. Sean is also the author Coaching Team Shape in the 3-3-1, Coaching Team Shape in the 4-2-3-1 and Coaching Team Shape in the 4-3-3

